Lesson Planning with Me

Hello! I teach an integrated preschool classroom, which means I am responsible for students ages three to five with special needs of all types as well as typical developing students. My students range in ability from a toddler to a typical kindergartener. Therefore, my activities must be able to reach a wide range and be easily adjusted for multiple ability levels.

I created this blog as a way to keep track of the fantastic ideas I have gathered over the years. Because I just randomly add activities to the blog, use the search, standard list, or theme list on the left side to find the activities you are after!

I also create and sell resources that can be found at TeachersPayTeachers and Teacher's Notebook.
Showing posts with label Halloween. Show all posts

Saturday, October 19, 2013

Oozy Foamy Ghost

From: Three Ghost Friends

Oozy, Foamy, Overflowy Ghost


My kids discovered a recipe for Elephant Toothpaste on Steve Spangler Science website and wanted to do it right away. I thought it would be fun to turn this cool science experiment into a fun ghost activity that your kids will love this Halloween. We did this for the WOW factor, but if you are interested in the science behind the experiment make sure you check out his site.
Supply List:

1 Clear large plastic container that is ghost-shaped. (I used a mayonnaise container.)

1 cup of hydrogen peroxide solution (many of the science websites call for a 20-volume hydrogen peroxide liquid that is a 6% solution and is available at beauty supply stores.  We just used the bottle we  had at home that was purchased at the pharmacy.)

2 teaspoons of dry active yeast

4 Tablespoons of warm water

Liquid Dish Soap (We used Dawn)

Food coloring (if you want a colored ghost -- Hey I know a good eBook for that!)

Small cup for mixing yeast and water (we used a yogurt container.)

Black Sharpie Marker

Safety goggles

Funnel

Measuring spoons

Mixing container that is pourable

Tray to collect overflowing foam

Three Ghost Friends eBooks or paperbacks

Procedure:
Here are some of the supplies we used! Hopefully, you have them in your house and you won't have to go buy these items at the store.  But, if you don't, you will find that they are all relatively inexpensive.
First, I drew a ghost face on the mayonnaise container.
Then, we poured 1 cup of hydrogen peroxide into the container. If you want to add food coloring you would do that now. We chose not to because we wanted a white ghost.
I had my oldest son squirt a bunch of Dawn dish soap into the container. You need around 2 Tablespoons.
My youngest son mixed the 2 teaspoons of dry active yeast with the 4 Tablespoons of warm water. 
We used a fork to break up the bits of yeast, and help it dissolve into the warm water..
Meanwhile, my son swirled around the Dawn dish soap and hydrogen peroxide. (Notice, he is not wearing safety goggles. We forgot and should have had them on because hydrogen peroxide can irritate skin and eyes.)
Next, we moved outside and placed our ghost container in a tray to collect the overflowing foam.
The funnel helped get the yeast and water mixture directly into the container without spilling.
Halloween Ghost Activity for kids!
The foam started growing immediately! 
Halloween Ghost Activity for Kids
My kids yelled and screamed with excitement at this point!
Halloween Ghost Activity
Very cool!
halloween science activity
The ghost looks like it is yelling,  "OH NO!"

oozy foamy overflowy ghost activity
Where did the ghost go?
Oozy, Foamy, Overflowy Ghost
BOO! There it is! 

Thursday, October 10, 2013

Monster Ideas

From PreKinders:

Monster Activities

Monster Song

[Music]
Play the song “The Mice Go Marching” from Hap Palmer’s album “Rhythms on Parade”. Children will tiptoe during the “mice” part and stomp during the “monster” part.


preschool monster unit

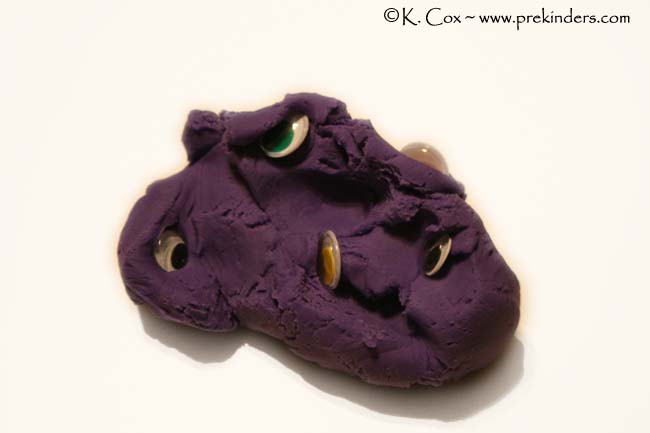
Monster Eyes

[Fine Motor]
Add wiggle eyes to the play dough (mixed in) and have the children pull out the “monster eyes”.


preschool monster art

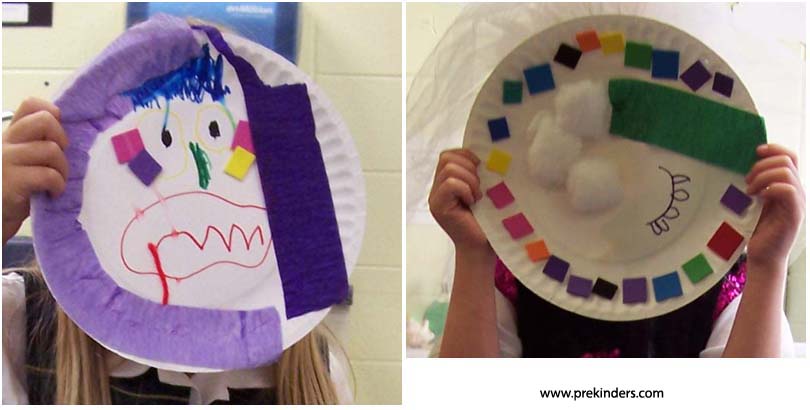
Monster Masks

[Art]
Children use several collage materials of their choice from our art center to create a monster mask on a paper plate.


preschool monster art

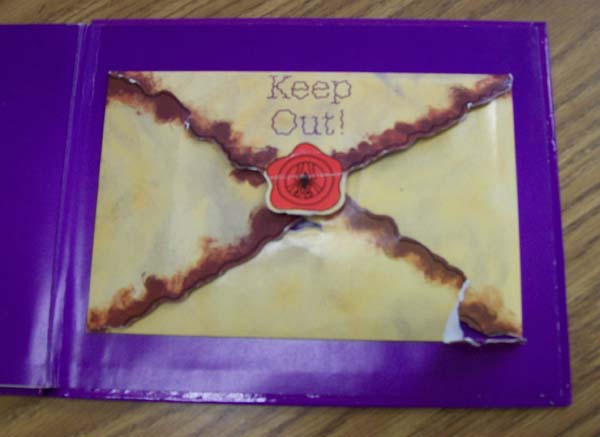
Bugs That Go Bump in the Night

[Art]
Before reading Bugs That Go Bump in the Night, remove the surprise from the envelope at the end of the book. At the end, show children the empty envelope and ask them to make something scary to put inside.


preschool monster art

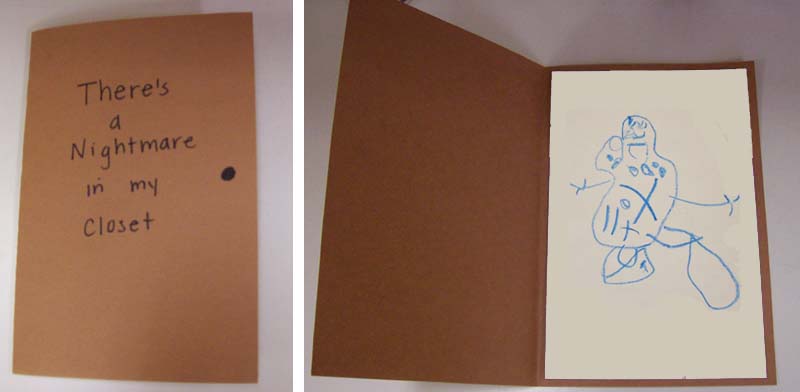
There’s a Nightmare in My Closet

[Art]
Fold a piece of brown construction paper (hamburger fold). On the inside, staple or glue a half-sheet of white drawing paper to the right side. On the front, write “There’s a Nightmare in My Closet”. Have the children draw a nightmare on the white paper on the inside of the “closet”. At large group, my students often like to talk about their nightmares and things that scare them. I think they like to get it out “in the open” and hear what other children have to say about their nightmares.


Halloween Theme

Go Away Big Green Monster

[Literacy]
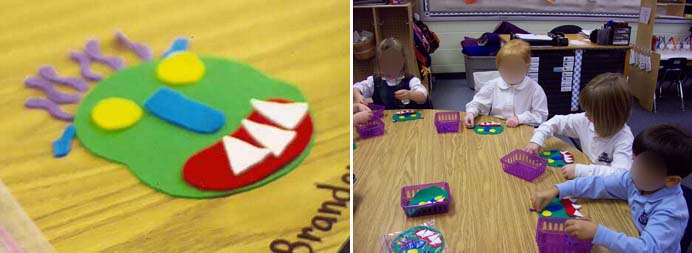
I made a set of “Big Green Monsters” for the children to use in small groups. I traced the pages of the book, Go Away Big Green Monster, to make patterns for cutting out the pieces from felt. As the story is read, the children add each piece of the monster’s face, then take them away. I also have the children retell the story as they manipulate the pieces.


Halloween Theme

Slime

[Science]
Read the blog post: Slime Science

Sunday, September 29, 2013

Pumpkin Letter Activities

From: Pre-K Pages

Halloween Letter Matching
pumpkin mat
Setting: Small Group, ABC/Literacy Centers

Objective: Visually discriminate letter shapes, matching

Materials: laminating film, scissors, orange construction paper, pen, magnetic letters

Directions: Fold each sheet of construction paper in half and cut it in the shape of a pumpkin. Use a pen to trace magnetic letters onto each pumpkin mat. Laminate the pumpkin mats and give one to each child in your small group. Have students match magnetic letters to the correct outlines.

Pumpkin Beginning Sounds
beginning sounds
Setting: Small Group, Literacy Centers

Objective: Letter Sounds

Materials: Orange construction paper, scissors, laminating film, Sharpie marker, alphabet items from Lakeshore Letter Sound Teaching Tubs, pumpkin container

Directions: Select certain sounds your students need to work on and place the items from the Lakeshore Letter Sound tubs in your pumpkin container. Cut large pumpkin shapes from the construction paper, write your letter sounds on each pumpkin with the Sharpie marker and laminate the pumpkins for durability. Seat students around the table, place the pumpkin container in the middle. Students will take turns selecting items from the container, identifying the beginning sound, and placing the item on the mat with the corresponding beginning sound.