Lesson Planning with Me

Hello! I teach an integrated preschool classroom, which means I am responsible for students ages three to five with special needs of all types as well as typical developing students. My students range in ability from a toddler to a typical kindergartener. Therefore, my activities must be able to reach a wide range and be easily adjusted for multiple ability levels.

I created this blog as a way to keep track of the fantastic ideas I have gathered over the years. Because I just randomly add activities to the blog, use the search, standard list, or theme list on the left side to find the activities you are after!

I also create and sell resources that can be found at TeachersPayTeachers and Teacher's Notebook.
Showing posts with label Science. Show all posts

Sunday, September 14, 2014

Apple Seed Predictions

Guess My Seeds

Idea from:  Everything Preschool
Clip art: KPM Doodles

I heavily altered this idea, but the original idea came from the Everything Preschool website. 

After talking about the growth of an apple tree: seed-tree-apple-back to seed; and the parts of an apple: stem, skin, flesh, core, pips (seeds), show the students an apple and let them guess the number of seeds in it.

Record predictions on a chart, if desired.

Then carefully cut the apple open (cross-wise if you want to find the star in the middle) and count how many seeds are inside. Whose predictions were closest?

So you don't waste the apple you can have apple slices for snack.

For hands on fun: After cutting the apple in half, give each student a half and a spoon and allow them to dig the seeds out themselves.

Other ideas you could add in:
 -Concepts of half/whole

-Function of each part of the apple (stem holds apples on the tree; skin and flesh for eating and protecting the seeds; seeds for growing new trees)


Thursday, January 9, 2014

Instant Snow!

How have I never heard of instant snow?!

From PreKinders:


Instant Snow Science @ Prekinders.com

 I live in Indiana, so you never know if actual snow will be available or not.  This is perfect!

Saturday, October 19, 2013

Oozy Foamy Ghost

From: Three Ghost Friends

Oozy, Foamy, Overflowy Ghost


My kids discovered a recipe for Elephant Toothpaste on Steve Spangler Science website and wanted to do it right away. I thought it would be fun to turn this cool science experiment into a fun ghost activity that your kids will love this Halloween. We did this for the WOW factor, but if you are interested in the science behind the experiment make sure you check out his site.
Supply List:

1 Clear large plastic container that is ghost-shaped. (I used a mayonnaise container.)

1 cup of hydrogen peroxide solution (many of the science websites call for a 20-volume hydrogen peroxide liquid that is a 6% solution and is available at beauty supply stores.  We just used the bottle we  had at home that was purchased at the pharmacy.)

2 teaspoons of dry active yeast

4 Tablespoons of warm water

Liquid Dish Soap (We used Dawn)

Food coloring (if you want a colored ghost -- Hey I know a good eBook for that!)

Small cup for mixing yeast and water (we used a yogurt container.)

Black Sharpie Marker

Safety goggles

Funnel

Measuring spoons

Mixing container that is pourable

Tray to collect overflowing foam

Three Ghost Friends eBooks or paperbacks

Procedure:
Here are some of the supplies we used! Hopefully, you have them in your house and you won't have to go buy these items at the store.  But, if you don't, you will find that they are all relatively inexpensive.
First, I drew a ghost face on the mayonnaise container.
Then, we poured 1 cup of hydrogen peroxide into the container. If you want to add food coloring you would do that now. We chose not to because we wanted a white ghost.
I had my oldest son squirt a bunch of Dawn dish soap into the container. You need around 2 Tablespoons.
My youngest son mixed the 2 teaspoons of dry active yeast with the 4 Tablespoons of warm water. 
We used a fork to break up the bits of yeast, and help it dissolve into the warm water..
Meanwhile, my son swirled around the Dawn dish soap and hydrogen peroxide. (Notice, he is not wearing safety goggles. We forgot and should have had them on because hydrogen peroxide can irritate skin and eyes.)
Next, we moved outside and placed our ghost container in a tray to collect the overflowing foam.
The funnel helped get the yeast and water mixture directly into the container without spilling.
Halloween Ghost Activity for kids!
The foam started growing immediately! 
Halloween Ghost Activity for Kids
My kids yelled and screamed with excitement at this point!
Halloween Ghost Activity
Very cool!
halloween science activity
The ghost looks like it is yelling,  "OH NO!"

oozy foamy overflowy ghost activity
Where did the ghost go?
Oozy, Foamy, Overflowy Ghost
BOO! There it is! 

Saturday, October 12, 2013

Exploding Chain

From Frugal Fun For Boys:

Build a Chain Reaction with Popsicle or Craft Sticks

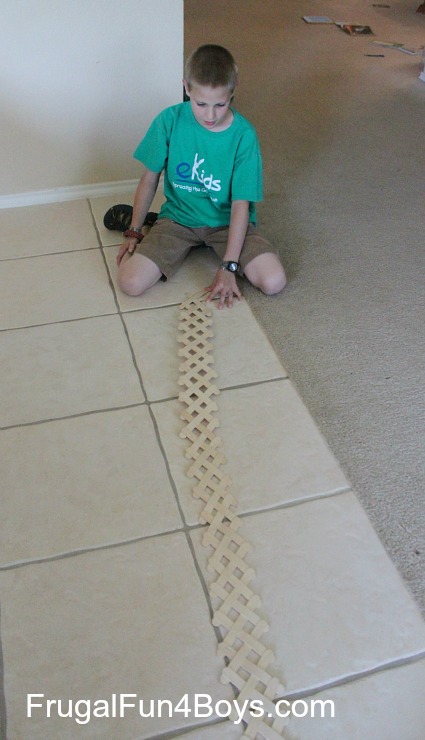
Did you know that you can build an exploding chain reaction by weaving together popsicle sticks or craft sticks?  I saw this post on Pinterest from Mom Trusted, and I knew that the boys would want to try this!
The chain stays together as long as you hold down the end that you are building onto.  Release the end and…
There is a video of our chain reaction in action at the end of the post!
The post on Mom Trusted said that the chain was pretty easy to build.  We found that it was actually kind of tricky to get started.  I didn’t want to be defeated by this silly project, so I was determined to get it right!  We put it aside for awhile, and when we came back to it, Aidan and I figured out the chain right away.  Getting started is the hard part – once you master than, the chain is not so bad.
Here’s how to build one:
We found that wide craft sticks work better than the skinny sticks.
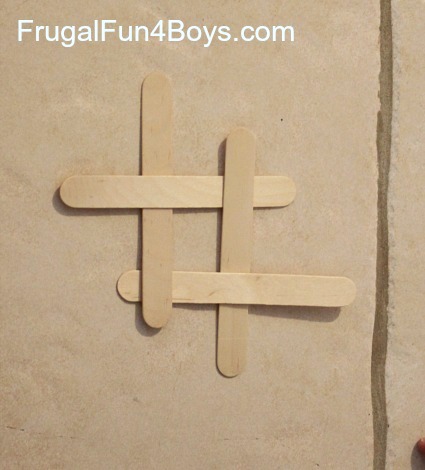
Step 1:  Arrange 4 craft sticks into this pattern.  Make them look exactly like this.
Step 2:  Add another stick to the top to secure the end.  This stick must go diagonally across to hold down the ends of the top horizontal stick and the right vertical stick.  If it won’t hold them both down, slide those two sticks out farther until they are successfully held down by the stick you added.
This next photo also shows the first chain stick added.
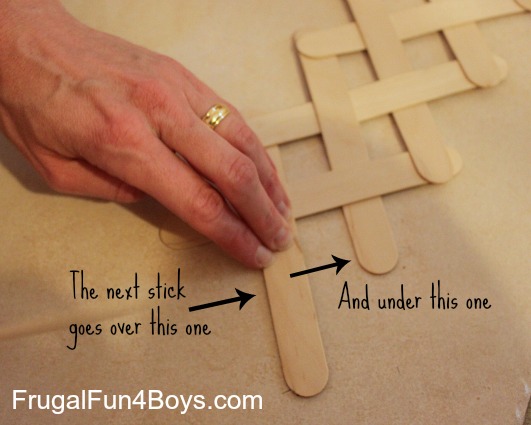
 Step 3:  Build the chain by adding craft sticks, one at a time to each side.  Each stick should go over one stick, and under one stick.
If a video would help, you can check out the post at Mom Trusted.  They have a great instructional video posted as well as a video of some kids who built a chain reaction with 1,000 sticks!  That one is totally worth watching.

Thursday, October 10, 2013

Monster Ideas

From PreKinders:

Monster Activities

Monster Song

[Music]
Play the song “The Mice Go Marching” from Hap Palmer’s album “Rhythms on Parade”. Children will tiptoe during the “mice” part and stomp during the “monster” part.


preschool monster unit

Monster Eyes

[Fine Motor]
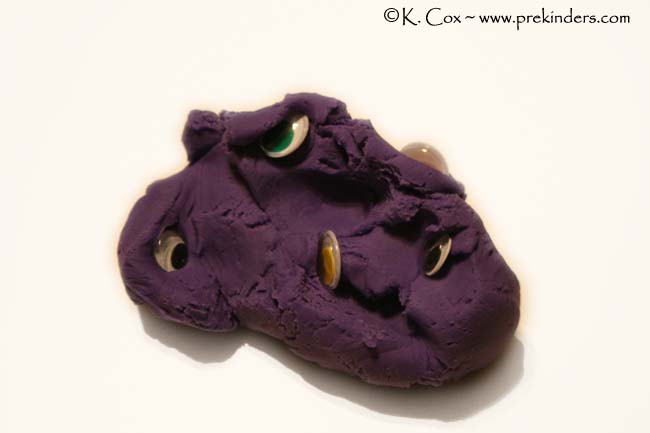
Add wiggle eyes to the play dough (mixed in) and have the children pull out the “monster eyes”.


preschool monster art

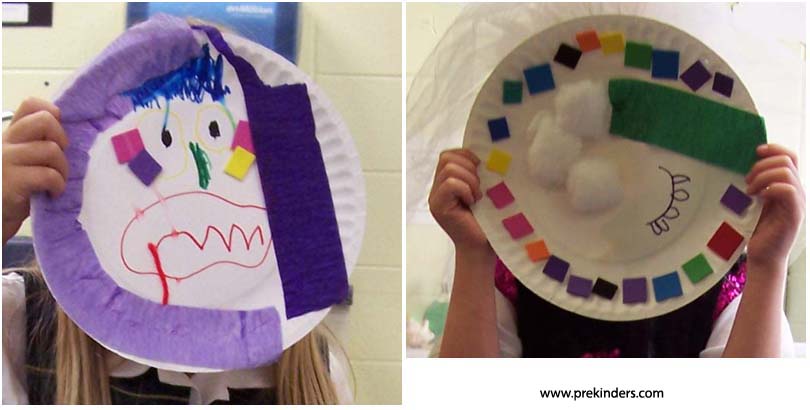
Monster Masks

[Art]
Children use several collage materials of their choice from our art center to create a monster mask on a paper plate.


preschool monster art

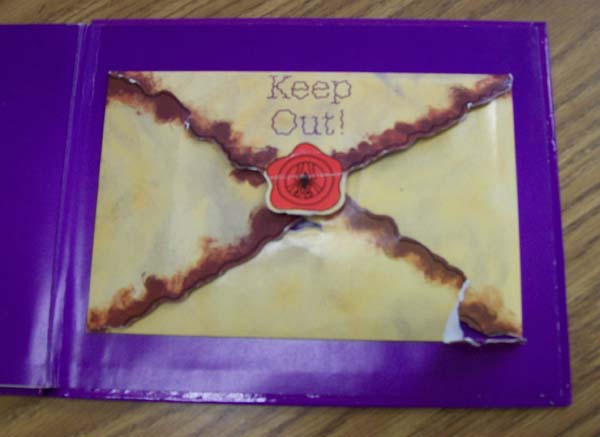
Bugs That Go Bump in the Night

[Art]
Before reading Bugs That Go Bump in the Night, remove the surprise from the envelope at the end of the book. At the end, show children the empty envelope and ask them to make something scary to put inside.


preschool monster art

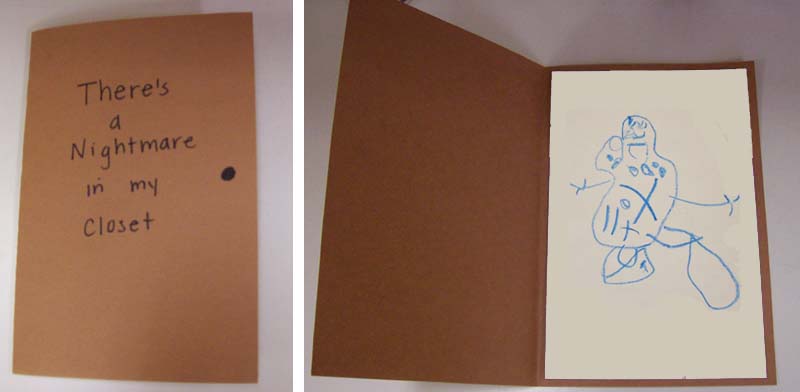
There’s a Nightmare in My Closet

[Art]
Fold a piece of brown construction paper (hamburger fold). On the inside, staple or glue a half-sheet of white drawing paper to the right side. On the front, write “There’s a Nightmare in My Closet”. Have the children draw a nightmare on the white paper on the inside of the “closet”. At large group, my students often like to talk about their nightmares and things that scare them. I think they like to get it out “in the open” and hear what other children have to say about their nightmares.


Halloween Theme

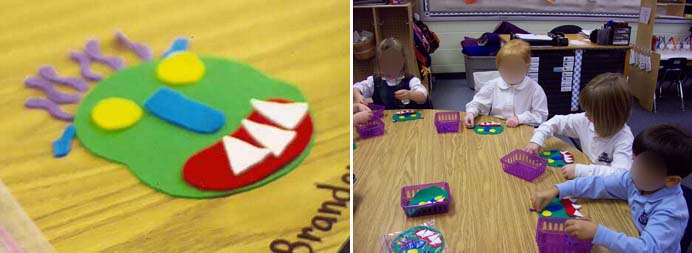
Go Away Big Green Monster

[Literacy]
I made a set of “Big Green Monsters” for the children to use in small groups. I traced the pages of the book, Go Away Big Green Monster, to make patterns for cutting out the pieces from felt. As the story is read, the children add each piece of the monster’s face, then take them away. I also have the children retell the story as they manipulate the pieces.


Halloween Theme

Slime

[Science]
Read the blog post: Slime Science

Sunday, September 29, 2013

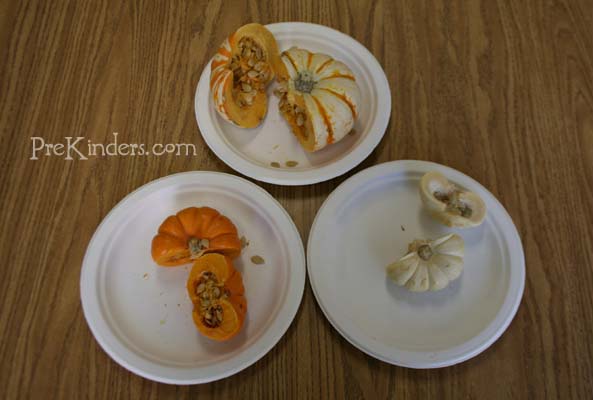
Exploring Pumpkins

From: PreKinders

pumpkin science center

We had several pumpkins of different sizes and colors for the children to observe, touch, and make observational drawings. After several weeks, these were cut in half for the children to observe the inside. Tweezers were placed in the science center with the pumpkins for children to pick out the seeds.

Sunday, September 15, 2013

Magic Mixture - Apple Dunking

From National Geographic:

Illustration: a boy looking at apple slices and a lemon.YOU WILL NEED
  • An apple
  • Half of a lemon
  • Shallow bowl
  • Water
  • Knife (ask a parent for help)
HERE'S HOW
Peel and slice an apple. Cover one slice with water in a shallow bowl. Sprinkle a second slice with the juice of half a lemon. Leave another slice exposed to the air. Wait about an hour, then compare. The slice with nothing on it turns brown.

WHY?
When an apple is cut open, chemicals inside the apple combine with oxygen from the air to form a brown coating. The coating keeps oxygen from getting deeper into the apple. Water protects the first slice from oxygen in the air so it stays white. Vitamin C in the lemon juice binds with oxygen, keeping oxygen away from the second slice, so it stays white the longest.

Text by Julie Vosburgh Agnone
Illustration by David Bamundo

Tuesday, January 22, 2013

Snowman in a Bag

From Teach Preschool:

Snowman in a Bag by Teach Preschool
This process is similar to our snowman in a bottle but if you didn’t have a bottle on hand, then gather up a baggie, some buttons, a snowman nose, and some snow and you are all set to go…
Snowman in a Bag by Teach Preschool
Place just just a couple of large spoon fulls of snow is all you need in the bag and then lay the bag flat.  Press and pack the snow so it stays flat and then arrange your button eyes and nose on the snow to make a snowman face.  Press the buttons and nose firmly into the snow…
Snowman in a Bag by Teach Preschool
Tape the snowman in a bag to a window so it can get some sunlight and let the melting begin…
Snowman in a Bag by Teach Preschool
Here’s what my snowman looked like after about 30 minutes…
Snowman in a Bag by Teach Preschool
And after about 1 hour…
Snow Activities 042
After about 1 hour 30 minutes…
Snowman in a Bag by Teach Preschool
And about 2 hours later…
Snow Activities 064
A very simple way to explore the melting of snow. Did you notice that bag seems much less full with the snow melted than before? And did you notice that the nose floats but the buttons sink?  And did you notice that snowman moved down the bag as it melted?  And did you notice that all that is left of the snowman is a bag of water?
Snowman in a Bag by Teach Preschool
If you want the printable to go with the snowman in a bag, just click here: Snowman Science by Teach Preschool


Sunday, December 16, 2012

Christmas Science

I found this at PreKinders.

Density Experiment

[Science]
For this activity, you will need four small water bottles, four bowls, funnel, water, clear shampoo, clear hair gel, corn syrup, glitter in Christmas colors, and paper towels. Place water, clear shampoo, clear hair gel, and corn syrup in the four bowls. First, show children the bowl of water and allow each child to dip one finger in and gently stir the water. Give each child a paper towel for drying off their finger. Pour the water into one of the bottles using the funnel, add a pinch or two of Christmas glitter, and attach the lid. Ask the children to predict whether the glitter will move fast or slow in the water when you shake the bottle. Shake the bottle and set it on the table so everyone can watch the glitter move. Repeat this process with the shampoo, corn syrup, and hair gel. You can also have the children move their bodies as fast or slow as they see the glitter move in each substance. These bottles can be added to the science center for further exploration (add masking tape around the lid or hot-glue the lids closed).

The Mitten

  This week, I started lesson planning using The Mitten by Jan Brett.  I love lesson planning around books.  The kids enjoy listening to the same story several times and then "reading" the story on their own later.  There are lots and lots of resources online, but I also made a packet for Teacher's Notebook that you can get here.  A few freebies are below:


Skills
Speech and Language
·        Increase vocabulary
·        Retell a familiar story
·        Story map
·        Rhyming words
·        Positional/location terms
·        Answer “who,” “what,” and “where,” and “why” questions

Math
·        Shape naming/matching
·        Big/little sorting
·        Size sequencing
·        Patterning
·        Numeral/sets matching
·        Order numerals/sets in order
·        Matching sets to numerals

Motor
·        Throw balls of yarn into a basket
·        Shaving cream play
·        Crystal painting
·        Mitten lacing

Cooking
·        Mitten Toast
·        Hot Chocolate Mix

Science
·        Touch and tell mittens


 j